
Hello, dessert lovers! Are you ready to treat yourself to something truly special? Today, I’m super excited to share with you my Red Velvet Strawberry Cheesecake recipe! It’s the perfect blend of creamy cheesecake and the unique flavors of red velvet cake, all topped with delicious strawberries. I mean, who could say no to that? This dessert is not only stunningly beautiful, but it’s also a treat for your taste buds! Perfect for birthdays, anniversaries, or just a cozy night in. So, let’s dive in!
Nutritional Benefits
Now, you might be wondering if this gorgeous dessert has any perks, right? Well, while it’s absolutely a treat, let’s think about a few of its components! Strawberries are a wonderful addition as they are loaded with vitamin C and antioxidants. And did you know that cream cheese does provide some calcium? If you want to make this dessert a bit lighter, consider using reduced-fat cream cheese or Greek yogurt for part of the cream cheese, providing you with a creamy texture without adding too many calories!
Adaptable Variations to Make
- Gluten-Free Option: You can easily swap out regular flour for a gluten-free blend to make this cheesecake gluten-free. Just check the blend’s substitutions for the best results.
- Dairy-Free Version: Try using vegan cream cheese and dairy-free butter for the crust. Your cheesecake will still be creamy and delightful!
- Different Fruit Toppings: While strawberries are fabulous, you can also top your cheesecake with blueberries, raspberries, or even a mix of seasonal fruits for a new twist.
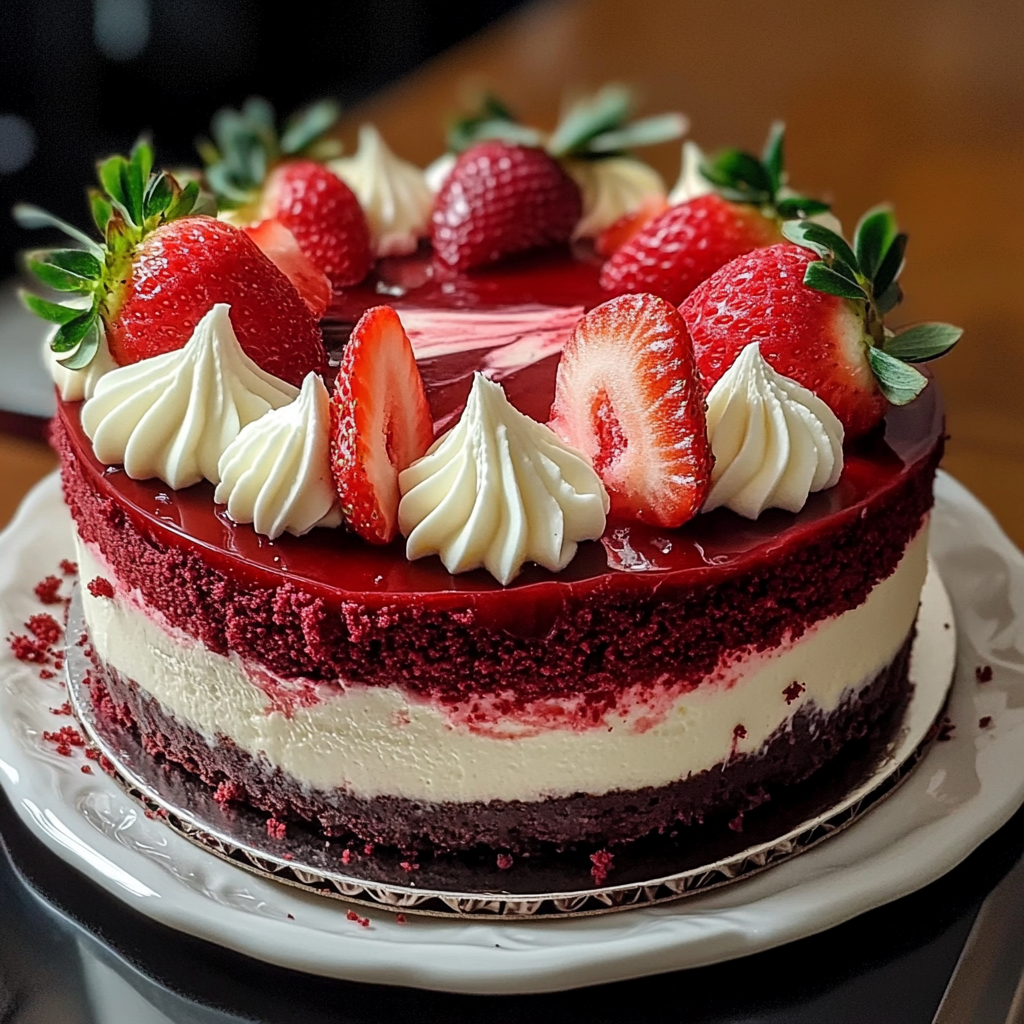
Decadent Red Velvet Strawberry Cheesecake Recipe
Ingredients
- For the crust:
- 1 ½ cups crushed red velvet cake (store-bought or homemade)
- ½ cup unsalted butter, melted
- 2 tablespoons sugar
- For the cheesecake filling:
- 24 oz cream cheese, softened
- 1 cup sugar
- 3 large eggs
- 1 teaspoon vanilla extract
- 1 tablespoon all-purpose flour
- 1 cup fresh strawberries, pureed
- Coloring (red if needed, but optional)
- For the topping:
- Fresh strawberries, sliced
- Whipped cream (optional)
Instructions
- First things first, preheat your oven to 325°F (165°C) and grease a 9-inch springform pan.
- In a bowl, combine the crushed red velvet cake with melted butter and sugar. Mix until combined, and then press the mixture evenly into the bottom of the prepared springform pan.
- For the filling, beat the softened cream cheese in a large bowl until smooth. Gradually add in the sugar and mix well.
- Next, add the eggs one at a time, ensuring each is well incorporated. Stir in the vanilla extract, flour, and pureed strawberries until you achieve a creamy consistency. You can adjust the color with food coloring if you’d like a deeper hue.
- Pour the cheesecake filling over the crust carefully, smoothing it out with a spatula.
- Bake in the preheated oven for 50-60 minutes. You want it to be mostly set but still slightly jiggly in the center.
- Turn off the oven, crack the door open, and let the cheesecake cool for about an hour before moving it to the fridge. Chill it for at least 4 hours or overnight for the best results.
- Once chilled, top with fresh strawberries and whipped cream, if desired. Slice and enjoy!
Practical & Valuable Tips
- Be sure to let your cream cheese soften; this helps create that smooth, lump-free filling. I like to leave mine at room temperature for about an hour.
- Use a water bath while baking if you want to ensure a silky texture. Just wrap the outside of the springform pan in aluminum foil and place it in a larger baking dish filled with water.
- To store leftovers, keep the cheesecake covered in the fridge for up to a week. You can also freeze individual slices wrapped tightly in plastic wrap for those moments when you crave a little sweetness!
Equipment Needed
Here’s what you’ll need to whip up this delightful cheesecake:
- A 9-inch springform pan for easy removal
- A mixing bowl and electric mixer for the cheesecake filling
- A spatula for smoothing the filling
- A measuring cup and spoons for precise measurements
- An oven-safe water bath (optional) for extra creaminess
Frequently Asked Questions
- Can I use frozen strawberries? While fresh strawberries are best for flavor, you can use frozen strawberries if that’s what you have on hand. Just make sure to thaw and drain them well to avoid excess moisture.
- How do I prevent cracks in my cheesecake? Avoid overmixing after adding the eggs, and cooling it gradually in the oven helps too!
- Can I make this cheesecake a day ahead? Absolutely! In fact, I highly recommend it! It allows the flavors to meld beautifully.
- What if my cheesecake doesn’t set well? If it’s still very soft after cooling, it may need more chilling time. You can pop it back in the fridge for a few more hours or even overnight.
- Can I just use a store-bought cheesecake crust? Definitely! If you’re short on time, a store-bought crust will work perfectly—it’ll save you some effort while still being delicious.
Are you excited to make your own Red Velvet Strawberry Cheesecake? I’d absolutely love to see how yours turns out! Snap a photo and share it with me on Pinterest. Let’s spread some dessert joy together!
