
Hello there, breakfast lovers! If you’re anything like me, some mornings are just way too busy for a sit-down meal. That’s why I’ve fallen in love with make-ahead freezer breakfast burritos! They’re delicious, filling, and perfect for anyone needing a quick, satisfying start to their day. You can whip up a batch in no time, toss them in the freezer, and then enjoy them whenever hunger strikes. Let me show you how I make my favorite breakfast burritos!
Nutritional Benefits of Breakfast Burritos
These burritos can be a nutritious start to your day! Packed with protein-rich eggs and your choice of fillings (think beans, veggies, or meat), they can set you up with energy to tackle anything. If you add in some greens like spinach or kale, you’ll not only boost the flavor but also load up on vitamins and minerals. Plus, using whole-wheat tortillas instead of regular ones can provide additional fiber, which is great for digestion!
Adaptable Variations
- Vegetarian Delight: You can easily turn these into a delightful vegetarian option by using black beans instead of meat and filling them with your favorite sautéed vegetables!
- Spicy Zing: Want a little kick? Toss in some jalapeños or swap regular cheese for pepper jack. Your taste buds will thank you!
- Dairy-Free Option: If you’re avoiding dairy, simply use a dairy-free cheese alternative or leave cheese out altogether—the burritos will still be delicious!
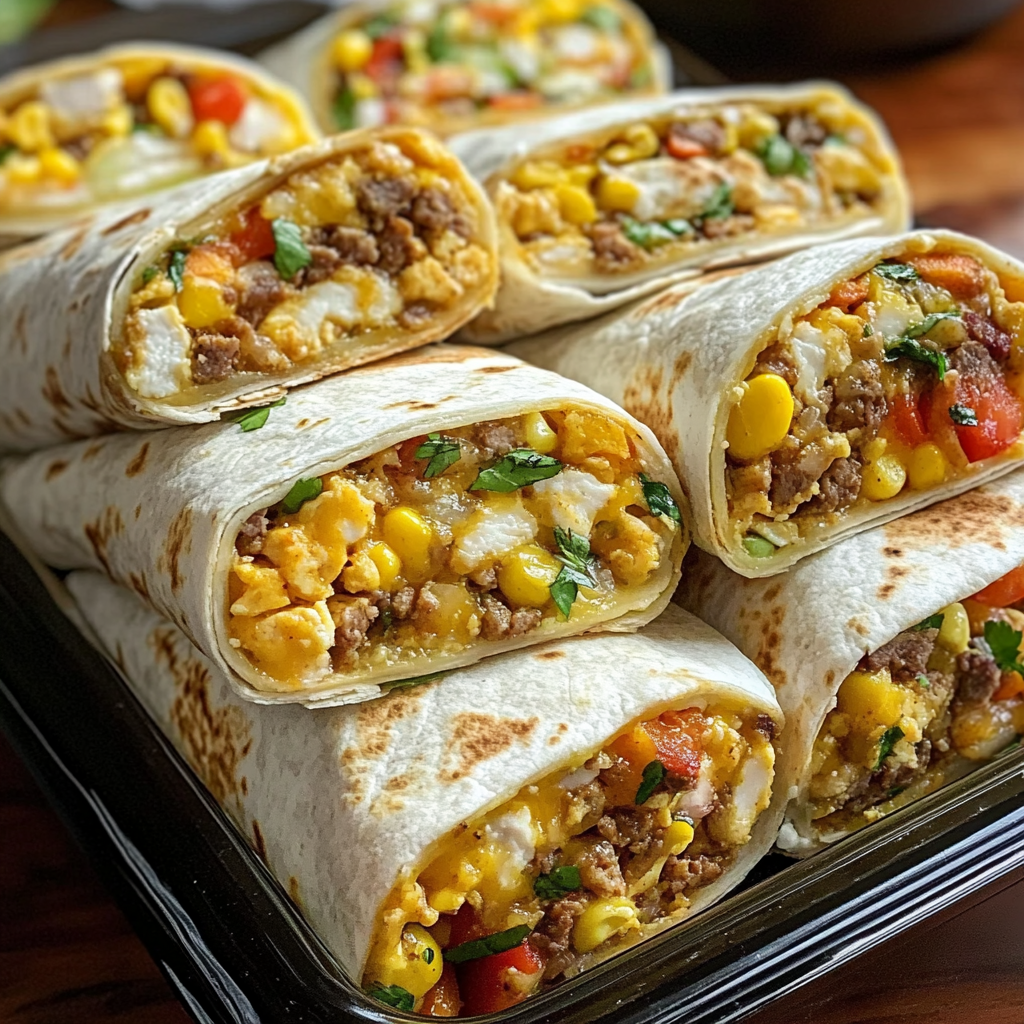
Easy Make-Ahead Freezer Breakfast Burritos Recipe
Ingredients
- 8 large eggs
- 1 cup cooked sausage or turkey bacon (or leave it out for vegetarian burritos)
- 1 cup shredded cheese (cheddar or your choice)
- 1 cup black beans (drained and rinsed)
- 1 cup diced bell peppers and onions
- 8 whole-wheat tortillas
- Salt and pepper to taste
Instructions
- Start by cracking the eggs into a large bowl. Whisk them together with a pinch of salt and pepper.
- In a large skillet over medium heat, add the diced bell peppers and onions. Sauté them until they are soft—about 5 minutes.
- Next, add your cooked sausage or bacon to the skillet. Pour in the whisked eggs and cook, stirring gently, until the eggs are fully scrambled. Remove from heat.
- In a big bowl, mix together the scrambled egg mixture, black beans, and shredded cheese. This is where you can adjust the seasonings if needed!
- Warm the tortillas in a pan until pliable. Lay a generous scoop of the egg mixture onto each tortilla. Fold in the sides and roll it up tightly.
- Wrap each burrito individually in plastic wrap or aluminum foil and place them in a labeled freezer bag. Freeze until you’re ready to eat!
Practical & Valuable Tips
- Want to keep the burritos from becoming soggy in the freezer? Be sure to let any ingredients cool completely before wrapping them up!
- When you’re ready to enjoy one, simply unwrap it from the foil or plastic, place it in a microwave-safe dish, and heat it for about 2-3 minutes, or until heated through.
- If you have leftovers, these burritos last about 3 months in the freezer—just don’t forget to label them! I can’t tell you how many times I’ve discovered mystery burritos!
Equipment Needed
Here’s a handy checklist of what you’ll need to make these delicious burritos:
- A large mixing bowl for the eggs
- A skillet for cooking
- A spatula for mixing
- Plastic wrap or aluminum foil
- A freezer-safe bag or container for storage
Frequently Asked Questions
- Can I use egg whites instead of whole eggs? Absolutely! Just use about 2 egg whites for each whole egg.
- How can I make these burritos spicier? Add some hot sauce to the egg mixture or include diced jalapeños!
- Can I make these burritos without beans? Yes, just skip the beans, but you might want to add extra veggies or another protein for balance.
- What’s the best way to reheat them? The microwave is great for speed, but you can also bake them at 350°F (175°C) for about 15-20 minutes for a lovely crispness.
- Can I add hash browns or potatoes? Definitely! Just cook them separately and mix them in with the eggs before wrapping.
Have you tried making these breakfast burritos? I’d love to hear how they turned out for you! Don’t forget to save or pin this recipe for later—you can find more delicious and quick meals on my Pinterest page. Let’s keep enjoying tasty meals together!
