
Hey there! If you love cheesecakes as much as I do, then you’re in for a real treat with these Irresistible Peanut Butter Caramel Mini Cheesecakes. I can’t even begin to tell you how delightful they are! With a creamy, luscious peanut butter filling topped with sweet caramel, they’re mini masterpieces that pack a flavorful punch. Plus, they’re the perfect size for a little indulgence without the guilt of a big slice. Let’s dive into this delicious recipe that will surely impress your friends and family!
Nutritional Benefits
Now, I know what you might be thinking: “Can a dessert be healthy?” Well, while these mini cheesecakes are definitely a treat, they do have some nutritious elements! Peanut butter is packed with protein and healthy fats, which can keep you feeling fuller for longer. Plus, using cream cheese provides calcium and a bit of protein. If you’re using a lighter cream cheese or Greek yogurt, this dessert can be even healthier. Just a little moderation, and you can satisfy your sweet tooth without overdoing it!
Adaptable Variations
- Dairy-Free Delight: You can easily swap the cream cheese with a dairy-free alternative like cashew cream or coconut cream for a delicious vegan version.
- For a Nut-Free Option: You could use sun butter (sunflower seed butter) in place of peanut butter, which keeps it nut-free but still gives a tasty flavor.
- Different Toppings: Not in the mood for caramel? Top your mini cheesecakes with fresh berries or a drizzle of chocolate for a delightful twist!
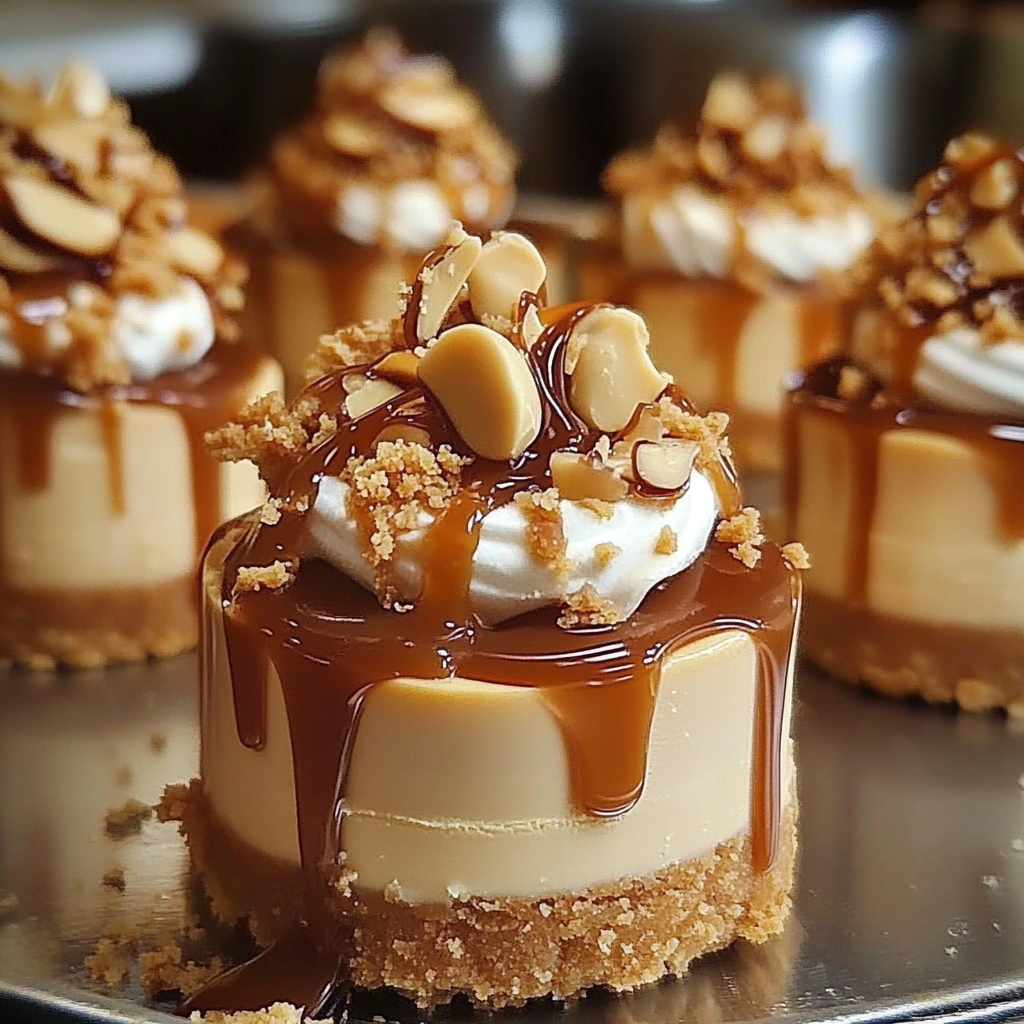
Irresistible Peanut Butter Caramel Mini Cheesecakes Recipe
Ingredients
- 1 cup graham cracker crumbs
- 3 tablespoons sugar
- 1/4 cup unsalted butter, melted
- 8 oz cream cheese, softened
- 1/2 cup peanut butter
- 1/4 cup sugar
- 1 teaspoon vanilla extract
- 2 eggs
- 1/2 cup caramel sauce (store-bought or homemade)
Instructions
- First, preheat your oven to 325°F (160°C) and line a muffin tin with paper liners.
- In a bowl, mix together the graham cracker crumbs, 3 tablespoons of sugar, and melted butter until well combined, resembling wet sand.
- Spoon about a tablespoon of the crust mixture into each muffin liner. Press down firmly with your fingers or the back of a teaspoon.
- In a separate bowl, beat the softened cream cheese, peanut butter, 1/4 cup sugar, and vanilla extract until nice and creamy.
- Add the eggs, one at a time, mixing on low speed until just combined. Be careful not to overmix!
- Evenly distribute the cheesecake mixture over the crusts in the muffin tins.
- Bake for about 20-25 minutes or until the edges look set but the center is still a bit jiggly.
- Remove from the oven and let them cool before drizzling with caramel sauce. Chill in the fridge for at least 2 hours before serving.
Practical & Valuable Tips
- These mini cheesecakes can be stored in an airtight container in the fridge for up to a week. But trust me, they won’t last that long!
- For a fancy presentation, consider whipping some cream and adding it on top, along with a dusting of extra graham cracker crumbs.
- If you want even more caramel goodness, heat your caramel sauce slightly before drizzling over the cheesecakes so it flows smoothly.
Equipment Needed
You won’t need much to whip these up! Grab these tools before you start:
- A muffin tin (don’t forget those paper liners!)
- A mixing bowl and a measuring cup
- A hand or stand mixer for that creamy filling
- A rubber spatula for mixing
- A spoon for pressing down the crust and drizzling the caramel
Frequently Asked Questions
- Can I make these mini cheesecakes ahead of time? Absolutely! They get better after chilling in the fridge, so make them a day in advance!
- What if I don’t have graham crackers? You can use digestive biscuits or even crushed cookies like Oreos for a different flavor!
- Can I substitute the cream cheese? Yes! For a lighter version, try using Greek yogurt or Neufchâtel cheese.
- How do I prevent them from cracking? Avoid overmixing the batter, and make sure not to bake them too long; they should still be a little jiggly in the center.
- Is it okay to freeze these? Yes! Wrap them tightly in plastic wrap and store in the freezer for up to 2 months. Just let them thaw in the fridge before serving.
Did you try making these mini cheesecakes? I would absolutely love to hear how they turned out! Share your baking adventures with me on Pinterest and let’s celebrate the sweet life together!
