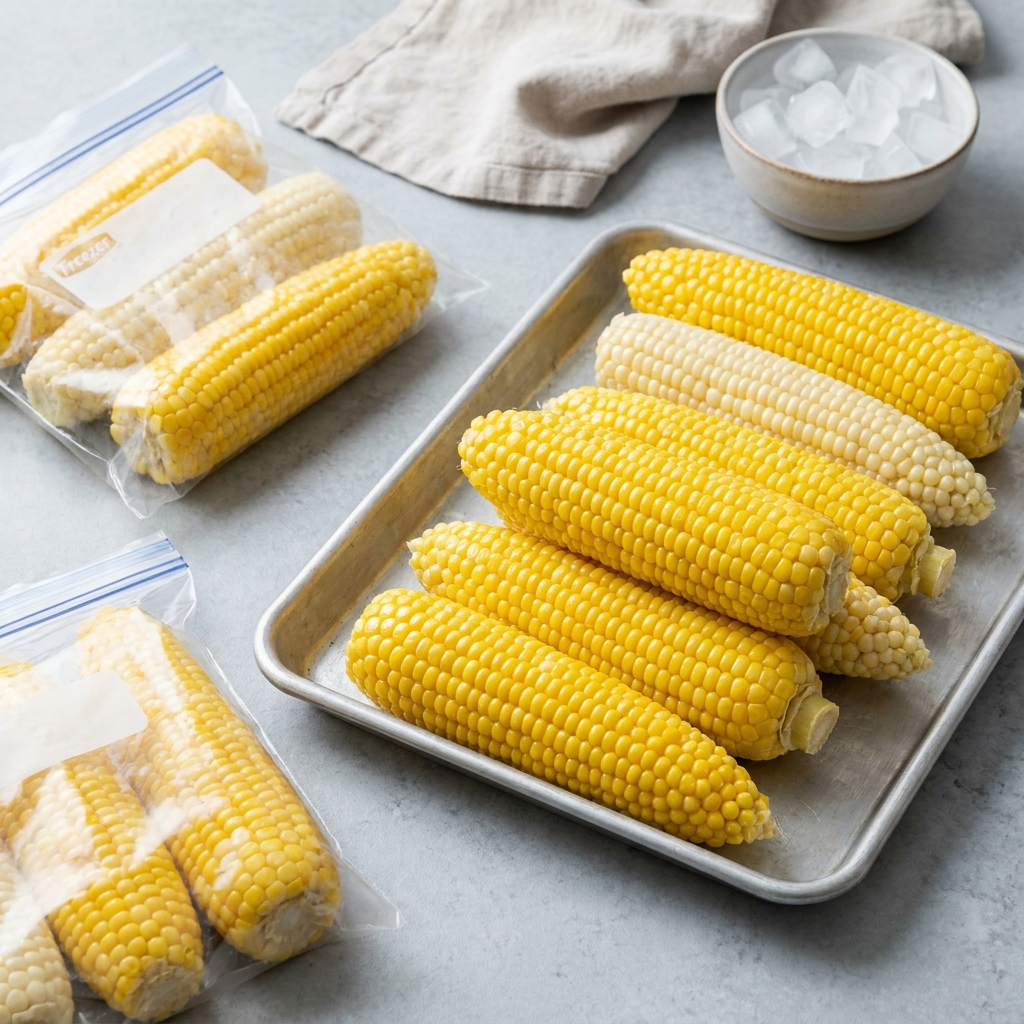
If you’ve ever brought home a big haul of fresh summer corn and wondered how to save it before it loses that just-picked sweetness, I’m so glad you’re here. Freezing corn on the cob is one of my favorite kitchen tricks because it lets you hold onto that bright, juicy flavor long after corn season ends. When you do it the right way, you can pull out an ear months later and still enjoy tender kernels and that classic sweet corn taste.
I’ve tried a few different methods over the years, and honestly, there isn’t just one “perfect” way. The best option depends on how much time you have, how much freezer space you’re working with, and how you plan to use the corn later. Some methods are faster, some protect texture a little better, and some are ideal if you want your corn fully prepped for quick dinners.
In this guide, I’m walking you through 8 practical ways to freeze corn on the cob without losing flavor, plus all the little tips that make a big difference. Whether you’re stocking the freezer after a farmers’ market trip or preserving your backyard harvest, I’ll help you do it safely and simply.
Quick Recipe Info Card
- Prep Time: 20 minutes
- Cook Time: 10 minutes
- Total Time: 30 minutes
- Servings: 8 servings
- Difficulty: Easy
Why You’ll Love It
- You can preserve fresh corn at peak sweetness.
- It helps reduce food waste during corn season.
- You’ll have ready-to-cook corn for quick weeknight meals.
- These methods work for small batches or big harvests.
- I’m sharing several options, so you can pick what fits your kitchen best.
- Blanching and freezing properly helps protect flavor, color, and texture.
- It’s a budget-friendly way to enjoy summer corn all year.
Nutritional Benefits and Adaptable Variations
- Naturally nutritious: Corn provides fiber, carbohydrates for energy, and small amounts of vitamins and minerals.
- Low in added ingredients: This freezing method uses simple pantry basics and keeps the corn naturally flavored.
- Flexible portions: Freeze whole ears, halved ears, or cut cobs to match your household size.
- Optional seasoning later: Keep the corn plain for maximum versatility, then add butter, salt, herbs, chili powder, or lime when serving.
- Can be frozen off the cob too: If you want easier storage, you can blanch first and cut the kernels away before freezing.
- Best method for your needs: Choose raw freezing for speed, blanching for best quality, or vacuum sealing for longer-lasting freshness.
Ingredients
- 8 ears fresh corn on the cob, husks and silk removed
- Water, enough for blanching
- Ice, for an ice bath
- 1 teaspoon salt, optional, for blanching water
8 Ways to Freeze Corn on the Cob
- Method 1: Freeze whole raw ears
- Method 2: Freeze raw ears cut in halves
- Method 3: Blanch whole ears before freezing
- Method 4: Blanch halved ears before freezing
- Method 5: Vacuum seal raw ears
- Method 6: Vacuum seal blanched ears
- Method 7: Freeze corn in meal-size portions
- Method 8: Blanch, dry, and wrap each ear individually for grab-and-go use
Step-by-Step Instructions
[INSERT PROCESS IMAGE HERE]
- Choose the freshest corn you can find. Look for firm ears with plump, brightly colored kernels and fresh-looking ends. For the best flavor, freeze corn as soon as possible after buying or picking.
- Shuck and clean the corn. Remove all husks and silk. Trim any rough ends if needed, then rinse the ears under cool water and pat them dry.
- Decide which freezing method you want to use. If you want the very best texture and flavor retention, I recommend blanching first. If you need the fastest option, freezing raw ears works too, although texture may soften a bit more later.
- For raw freezing methods, dry the corn well. Excess moisture can create ice crystals, so make sure the ears are as dry as possible before packaging.
- Method 1: Freeze whole raw ears. Place cleaned, dry ears in freezer-safe bags or wrap tightly in freezer wrap and then bag them. Remove as much air as possible, label, and freeze.
- Method 2: Freeze raw ears cut in halves. Cut each ear in half for easier storage and smaller portions. Pack into freezer-safe bags, press out extra air, label, and freeze.
- Prepare for blanching if using Methods 3, 4, 6, 7, or 8. Bring a large pot of water to a boil. Fill a large bowl with ice water and set it nearby.
- Blanch the corn. Carefully lower the ears into boiling water. Blanch small ears for 7 minutes, medium ears for 9 minutes, and large ears for 10 minutes.
- Cool immediately. Transfer the corn straight into the ice bath and let it cool for the same amount of time used for blanching. This stops the cooking and helps preserve texture.
- Dry thoroughly. Remove the cooled corn and pat it very dry with clean kitchen towels or paper towels.
- Method 3: Freeze whole blanched ears. Arrange the dry ears in freezer bags or containers, remove as much air as possible, label, and freeze.
- Method 4: Freeze blanched halved ears. Cut blanched ears in half, then package in meal-size freezer bags and freeze.
- Method 5: Vacuum seal raw ears. Place dry raw ears in vacuum-seal bags, seal according to the machine instructions, label, and freeze. This is great for reducing freezer burn.
- Method 6: Vacuum seal blanched ears. After blanching and drying, vacuum seal the ears, label, and freeze for excellent quality and storage life.
- Method 7: Freeze corn in meal-size portions. Pack 2 to 4 ears, whole or halved, per bag depending on how much your family usually eats. Label each bag with the date and quantity.
- Method 8: Wrap individually for convenience. Wrap each blanched, dry ear tightly in plastic wrap or freezer paper, then place the wrapped ears in a large freezer bag or container. This makes it easy to grab only what you need.
- Freeze promptly. Lay bags in a single layer at first so they freeze faster and more evenly. Once frozen solid, you can stack them to save space.
- To use later, cook from frozen or thaw safely. You can boil, steam, roast, or microwave frozen corn on the cob. For food safety, thaw in the refrigerator if you prefer to thaw first, not on the counter.
Tips, Serving Suggestions & Substitutions
- Best quality tip: Blanching is the method I recommend most if flavor retention is your top priority. It slows the enzyme activity that can dull sweetness over time.
- Don’t skip drying: Wet corn can form frost and ice crystals, which affects texture.
- Label everything: Add the date and whether the corn is raw or blanched so you know exactly what you’re grabbing later.
- Use sturdy freezer bags: Thicker bags or vacuum sealing help protect the corn better during long storage.
- Serving ideas: Top cooked corn with butter and flaky salt, garlic herb butter, chili lime seasoning, grated Parmesan, or a little smoked paprika.
- Substitution option: If you don’t want to freeze whole cobs, use the same blanching method and cut off the kernels for soups, casseroles, salads, and corn chowder.
- Portion smartly: I like freezing some whole ears for barbecues and some halved ears for quick family dinners.
Nutrition Information
| Nutrient | Approximate Amount Per Serving |
|---|---|
| Calories | 90 |
| Carbohydrates | 19 g |
| Protein | 3 g |
| Fat | 1 g |
| Saturated Fat | 0.2 g |
| Cholesterol | 0 mg |
| Sodium | 10 mg |
| Fiber | 2 g |
| Sugar | 6 g |
Nutrition values are estimates and can vary based on corn size, variety, and any seasonings added when serving.
Storage & Make-Ahead Tips
For the best flavor and texture, use frozen corn on the cob within 8 to 12 months. Keep your freezer at 0°F (-18°C) or below for safe long-term storage. Once frozen, store bags flat or stacked neatly to save space.
If you’re prepping ahead, you can shuck the corn and refrigerate it for a short time before blanching, but I find that freezing it the same day gives the freshest flavor. After cooking frozen corn, don’t refreeze leftovers unless they’ve been handled safely and cooled promptly.
When you’re ready to use it, you can boil frozen corn for about 4 to 6 minutes, steam it until hot, or roast it after thawing. Since the corn is already preserved at its peak, simple cooking really lets the sweetness shine.
FAQ
1. Is it better to freeze corn on the cob raw or blanched?
Blanched is usually better for flavor, color, and texture over time. Raw freezing is faster, but blanching helps preserve quality more effectively during freezer storage.
2. How long should I blanch corn on the cob before freezing?
Blanch small ears for 7 minutes, medium ears for 9 minutes, and large ears for 10 minutes. Then cool them in ice water for the same amount of time.
3. Can I freeze corn on the cob in the husk?
You can, but I don’t recommend it for best results. Removing the husk and silk first gives you cleaner storage, easier cooking later, and more consistent freezing quality.
4. How long does frozen corn on the cob last?
For best quality, try to use it within 8 to 12 months. It may remain safe longer if continuously frozen, but the texture and flavor can slowly decline.
5. Do I need to thaw frozen corn on the cob before cooking?
No, not usually. You can cook it straight from frozen by boiling, steaming, or microwaving. If you do thaw it first, thaw it in the refrigerator for food safety.
Final Thoughts
I really love having a stash of frozen corn on the cob ready to go because it makes everyday meals feel a little more like summer. Once you see how easy freezing corn on the cob can be, it becomes one of those simple seasonal habits that pays off all year long.
If you try one of these 8 methods, I’d love to hear which one works best for you. Feel free to leave a comment, share this post with a fellow corn lover, and save it to Pinterest so you can come back to it during harvest season.
Freezing Corn on the Cob without Losing Flavor (8 Ways)
Equipment
- 1 large pot for blanching
- 1 large bowl for ice bath
- 1 tongs for transferring hot corn
- 1 knife for trimming or halving ears
- 1 cutting board for prep
- 1 freezer-safe bags or containers for storage
- 1 clean kitchen towels or paper towels for drying corn
- 1 vacuum sealer optional, for methods 5 and 6
Ingredients
Main Ingredients
- 8 ears fresh corn on the cob husks and silk removed
- 1 large pot water enough for blanching
- 1 large bowl ice for ice bath
- 1 teaspoon salt optional, for blanching water
Instructions
- Choose fresh, firm ears of corn with plump kernels, and freeze them as soon as possible after buying or harvesting for the best flavor.
- Shuck the corn, remove all silk, trim rough ends if needed, rinse under cool water, and pat dry.
- Decide on your freezing method: raw whole ears, raw halved ears, blanched whole ears, blanched halved ears, vacuum-sealed raw ears, vacuum-sealed blanched ears, meal-size portions, or individually wrapped blanched ears.
Raw Freezing Methods
- For Method 1, place dry whole raw ears in freezer-safe bags or wrap tightly, remove excess air, label, and freeze.
- For Method 2, cut dry raw ears in half, pack into freezer-safe bags, remove excess air, label, and freeze.
- For Method 5, place dry raw ears in vacuum-seal bags, seal according to machine directions, label, and freeze.
Blanching Base Method
- Bring a large pot of water to a boil and prepare a large bowl of ice water nearby.
- Lower the ears into boiling water and blanch small ears for 7 minutes, medium ears for 9 minutes, and large ears for 10 minutes.
- Transfer the corn immediately to the ice bath and cool for the same amount of time used for blanching.
- Remove the corn from the ice bath and dry thoroughly with clean towels.
Blanched Freezing Methods
- For Method 3, pack whole blanched ears into freezer bags or containers, remove excess air, label, and freeze.
- For Method 4, cut blanched ears in half, portion into freezer bags, label, and freeze.
- For Method 6, vacuum seal the blanched dry ears, label, and freeze.
- For Method 7, divide whole or halved ears into meal-size portions of 2 to 4 ears per bag, label, and freeze.
- For Method 8, wrap each blanched dry ear individually in plastic wrap or freezer paper, then place the wrapped ears in a large freezer bag or container, label, and freeze.
- Lay packed corn in a single layer in the freezer until solid, then stack as needed to save space.
- Cook from frozen or thaw safely in the refrigerator before using.