
Hey there! If you’re anything like me, you simply can’t resist a delicious slice of strawberry cheesecake. It’s rich, creamy, and bursting with fresh strawberry flavor—what’s not to love? I adore making this cheesecake; it’s a hit at parties and even as a cozy family dessert. And let me tell you, there’s something so rewarding about making a dessert that tastes like it came straight from a fancy bakery, all while still being easy enough to whip up at home!
Nutritional Benefits
Let’s talk about some benefits of indulging in this delightful cheesecake. Strawberries are loaded with vitamin C and antioxidants, which can help boost your immune system and protect your heart. Plus, cream cheese provides calcium and a little protein. All in all, while it’s definitely a rich dessert, you can enjoy a slice knowing there are some tasty benefits in there too!
Adaptable Variations
- Nut-Free Option: You could easily use a gluten-free cookie for your crust instead of graham crackers if you’re avoiding gluten.
- Less Sugar: If you’re looking for a healthier twist, consider reducing the sugar or using a sugar alternative like honey or maple syrup!
- Berry Bliss: Want something a little different? Swap the strawberries for blueberries or raspberries for a fun twist on flavors!
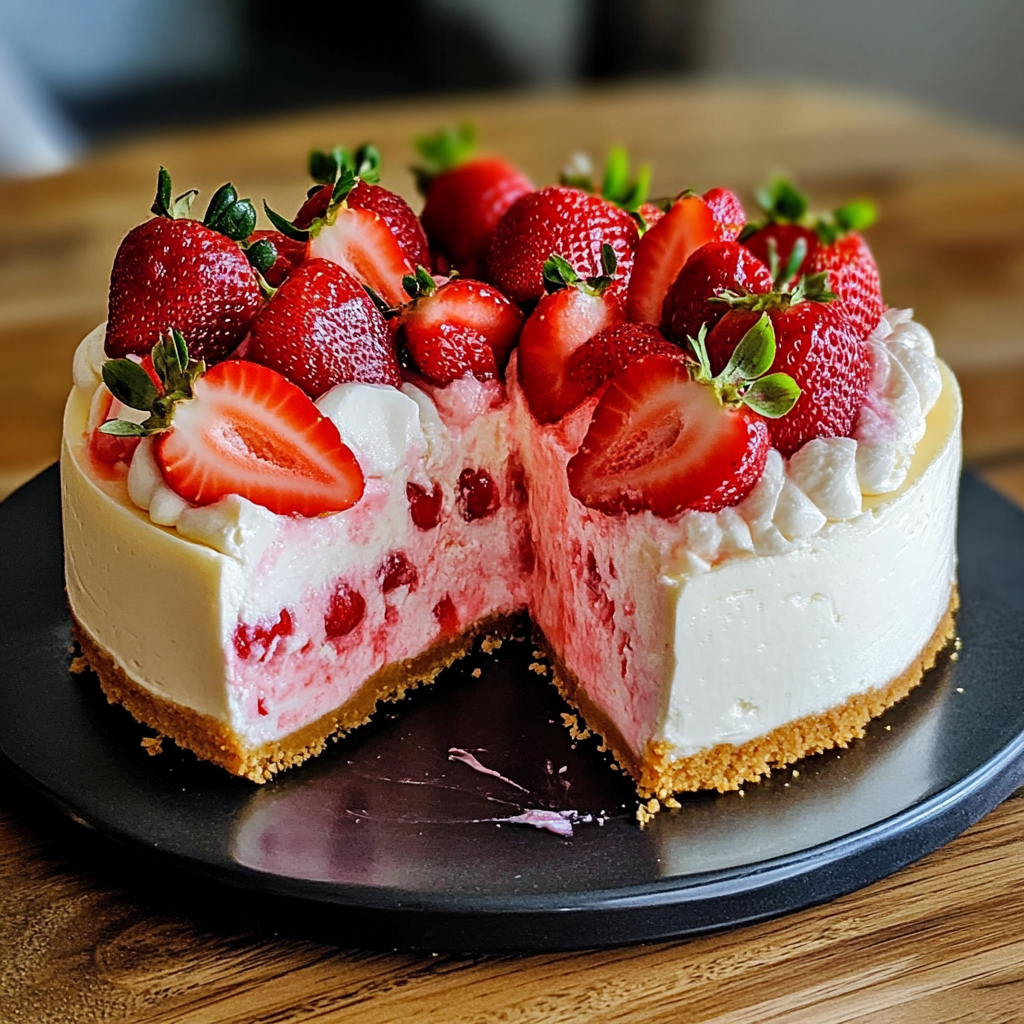
Classic Strawberry Cheesecake Recipe
Ingredients
- 1 ½ cups graham cracker crumbs
- ½ cup unsalted butter, melted
- 2 cups cream cheese, softened
- 1 cup granulated sugar
- 1 teaspoon vanilla extract
- 3 large eggs
- 1 cup sour cream
- 1 tablespoon all-purpose flour
- 2 cups fresh strawberries, hulled and sliced
- ¼ cup strawberry glaze (or strawberry jam)
- Fresh whole strawberries (for topping)
- Mint leaves (optional, for garnish)
Instructions
- Preheat your oven to 325°F (163°C).
- In a mixing bowl, combine the graham cracker crumbs and melted butter. Mix until the crumbs are evenly coated.
- Press the graham cracker mixture firmly into the bottom of a 9-inch springform pan to form the crust. Bake in the preheated oven for about 10 minutes, then remove and let cool.
- In a large mixing bowl, beat the softened cream cheese with an electric mixer until smooth and creamy.
- Gradually add the granulated sugar and continue to mix until fully incorporated.
- Add the vanilla extract and mix well, then add the eggs one at a time, blending on low speed after each addition.
- Fold in the sour cream and flour until just combined. Be sure not to overmix.
- Gently stir in the sliced strawberries into the cheesecake mixture, ensuring even distribution.
- Pour the cheesecake mixture over the cooled crust in the springform pan, using a spatula to smooth the top.
- Bake the cheesecake in the oven for about 55 minutes, or until the edges are set and the center is slightly jiggly.
- Turn off the oven and crack the door open, allowing the cheesecake to cool in the oven for about an hour to prevent cracking.
- Remove the cheesecake from the oven and let it cool to room temperature, then refrigerate for at least 4 hours (preferably overnight) to set completely.
- Once chilled, carefully remove the sides of the springform pan.
- Top the cheesecake with strawberry glaze, arranging fresh sliced strawberries on top, and garnish with whole strawberries and mint leaves if desired.
- Slice and serve chilled. Enjoy your rich and creamy strawberry cheesecake!
Practical & Valuable Tips
- For the creamiest texture, ensure your cream cheese is at room temperature before mixing.
- If you notice cracks on the cheesecake after baking, don’t worry! You can cover them with the strawberry topping for a beautiful finish.
- Leftovers can be stored in an airtight container in the fridge for up to 5 days. Just be sure to let it come to room temperature for the best taste when serving!
- Need a smoother crust? Try pulsing the graham crackers in a food processor for finer crumbs.
- If you want to make this cheesecake ahead of time, it can be kept frozen for up to 2 months. Just wrap it well in plastic wrap and follow thawing instructions!
Equipment Needed
Here’s a handy list of the tools you’ll want to keep nearby:
- A 9-inch springform pan (for easy removal of your beautiful cheesecake)
- A mixing bowl (a large one for your creamy filling)
- An electric mixer (to beat that cream cheese to perfection)
- A spatula (for smoothing things out)
- Baking sheets (for the crust and to catch any potential drips)
- A sharp knife (for slicing up that lovely cheesecake)
Frequently Asked Questions
- Can I use frozen strawberries instead of fresh? Yes, but make sure to thaw and drain them to avoid excess moisture in the cheesecake.
- My cheesecake cracked; what happened? It’s likely due to the temperature changes while cooling. Next time, try cooling in the oven as I’ve suggested!
- Can I make this cheesecake ahead of time? Absolutely! It’s best if made a day in advance; it allows the flavors to deepen.
- What can I use instead of sour cream? Cream cheese works too, or you could use Greek yogurt for a healthier option!
- How do I know when my cheesecake is done? The edges should look set, but the center should still have a slight jiggle—it will firm up as it cools!
Did you make this fabulous strawberry cheesecake? I can’t wait to hear how it turned out! Snap a pic and share your creation with me on Pinterest for more sweet inspirations and recipes!
