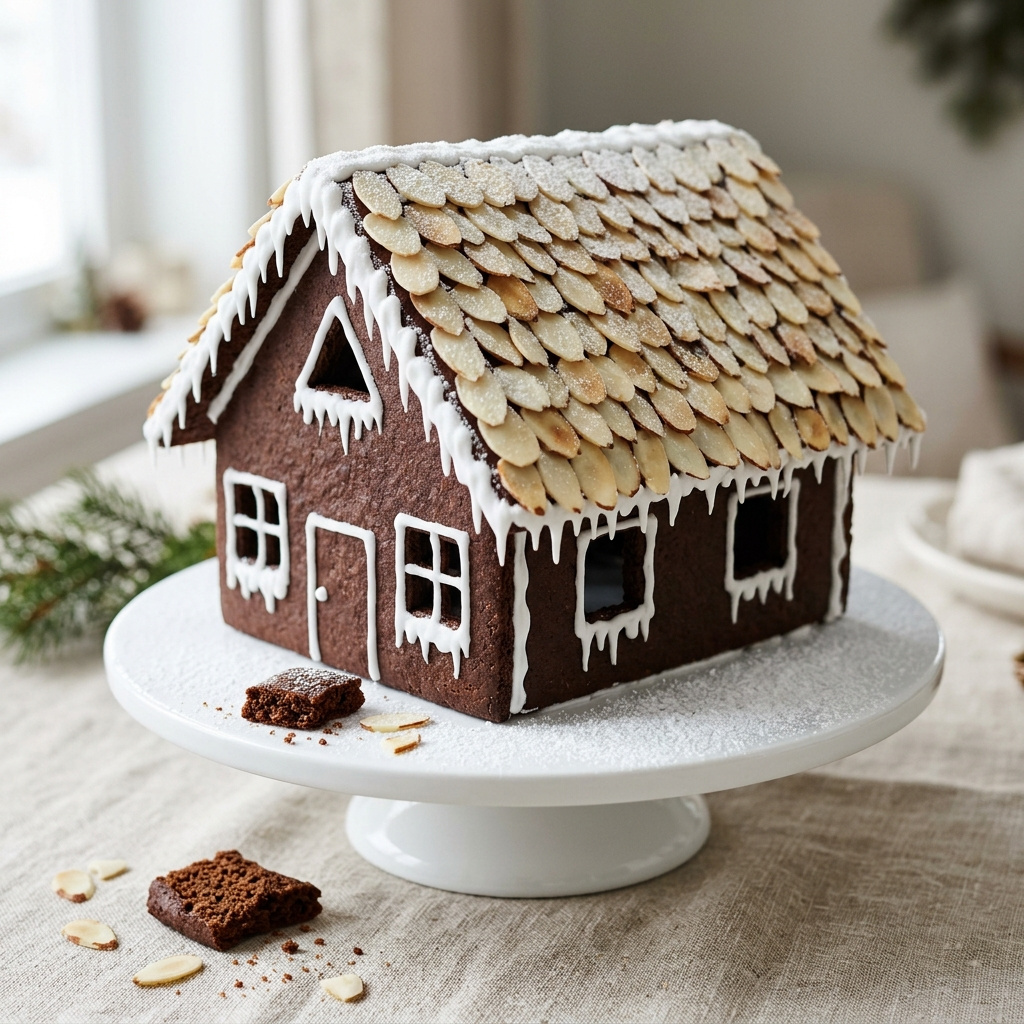
This Chocolate Gingerbread Chalet with Almond Shingles is a festive centerpiece dessert that combines deep cocoa flavor, warm gingerbread spices, and crisp toasted almonds for a striking holiday bake. The cookie panels are sturdy enough for assembly yet tender enough to enjoy once sliced or broken into pieces for serving.
A simple royal icing acts as both the decorative snow and the glue that holds the chalet together, while the chocolate-gingerbread dough bakes into neat, dark panels with clean edges. Almond shingles add texture and a charming roof detail that makes the finished house look polished without requiring complicated decorating skills.
Plan a little time for chilling, baking, cooling, and assembly, and you will have an edible showpiece that tastes as good as it looks. This recipe is designed for one medium chalet, perfect for displaying on a platter and serving as a holiday dessert for a small gathering.
Recipe Overview
- Prep time: 45 minutes
- Cook time: 18 minutes
- Total time: 153 minutes
- Servings: 10 servings
- Difficulty: Intermediate
Why You’ll Love It
- The chocolate gingerbread dough is richly flavored with cocoa, ginger, cinnamon, and molasses for a deeper twist on a classic holiday cookie house.
- Royal icing makes the structure secure while also doubling as decorative snowy trim around the roofline, windows, and base.
- Sliced almonds create realistic roof shingles with a simple ingredient that is easy to apply and beautifully textured.
- The chalet can be made in stages, which helps spread the work across a day or weekend baking session.
- Each finished piece is fully edible, from the spiced cookie walls to the almond-topped roof and icing details.
Nutritional Benefits and Adaptable Variations
- Use a paper template for two side walls, two roof panels, a front wall, and a back wall so the chalet pieces match neatly during assembly.
- For extra spice, increase the ground ginger from 2 teaspoons to 2 1/2 teaspoons without changing the dough texture.
- Add 1 tablespoon finely grated orange zest to the dough for a bright citrus note that pairs well with chocolate and molasses.
- Decorate the base with extra royal icing and a light scatter of sliced almonds to mimic snowy drifts and fallen shingles.
- If preferred, replace the almond shingles with pumpkin seeds or leave the roof plain with piped icing lines for a nut-free look.
Ingredients
- 2 1/2 cups all-purpose flour
- 1/2 cup unsweetened cocoa powder
- 1 teaspoon baking soda
- 1/2 teaspoon fine salt
- 2 teaspoons ground ginger
- 1 1/2 teaspoons ground cinnamon
- 1/4 teaspoon ground cloves
- 1/2 cup unsalted butter, softened
- 1/2 cup packed dark brown sugar
- 1/2 cup unsulfured molasses
- 1 large egg
- 1 teaspoon vanilla extract
- 2 tablespoons milk
- 2 large egg whites
- 3 1/2 cups powdered sugar
- 1/2 teaspoon cream of tartar
- 1/2 teaspoon vanilla extract for icing
- 3/4 cup sliced almonds
Step-by-Step Instructions
- In a medium bowl, whisk together the flour, cocoa powder, baking soda, salt, ginger, cinnamon, and cloves until evenly combined.
- In a large bowl, beat the softened butter and brown sugar until smooth and slightly fluffy, about 2 minutes. Beat in the molasses, egg, and vanilla extract until fully combined, then mix in the milk.
- Add the dry ingredients to the wet ingredients and mix on low speed or stir with a sturdy spoon until a firm dough forms with no dry streaks remaining.
- Divide the dough into 2 flat discs, wrap well, and chill for 45 minutes so it is easier to roll and cut cleanly.
- While the dough chills, prepare paper templates for 2 roof panels about 6 by 4 inches, 2 side walls about 5 by 3 inches, 1 front wall about 4 by 5 inches with a peaked top, and 1 back wall to match.
- Preheat the oven to 350°F and line 2 baking sheets with parchment paper.
- Roll one disc of dough between sheets of parchment to about 1/4-inch thickness. Cut the chalet pieces using the templates, rerolling scraps as needed. Transfer the cut pieces to the prepared baking sheets, spacing them slightly apart.
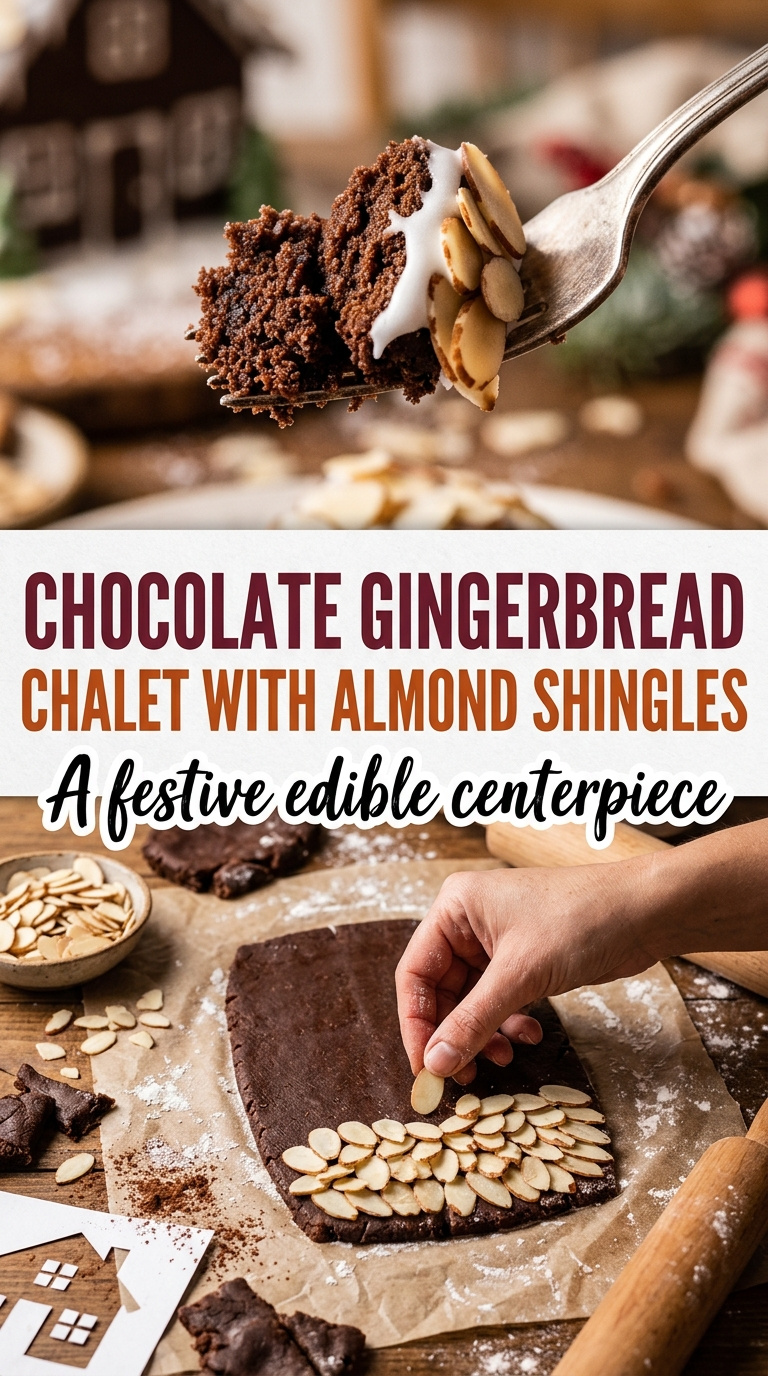
- For the roof panels, gently press sliced almonds in overlapping rows onto the dough to resemble shingles, leaving a small border around the edges so the icing can adhere later.
- Bake the smaller wall pieces for 8 to 10 minutes and the larger roof pieces for 10 to 12 minutes, rotating the pans halfway through, until the centers look set and the edges are firm.
- If needed, trim the pieces immediately after baking while still warm, using the templates and a sharp knife for clean edges. Let the panels cool on the baking sheets for 10 minutes, then transfer to a wire rack to cool completely for 30 minutes.
- To make the royal icing, beat the egg whites, powdered sugar, cream of tartar, and icing vanilla extract until thick, glossy, and able to hold stiff peaks, about 5 to 7 minutes. Keep the bowl covered when not in use so the icing does not dry out.
- Spoon some icing into a piping bag or zip-top bag with a small corner snipped off. Pipe a thick line of icing along the edges of one side wall and the front wall, then hold them together upright until they begin to set. Repeat with the second side wall and the back wall to form the chalet base.
- Let the assembled walls stand for 15 minutes to firm up, then pipe icing along the top edges and attach the two roof panels. Hold each panel briefly so it stays in place, then add extra icing along the roof seam and all outer joints for strength.
- Decorate the chalet with piped window frames, snowy roof edges, and a border around the base. Let the finished chalet rest for 20 minutes before moving or serving so the icing can fully set.
Tips, Serving Suggestions & Substitutions
- Roll the dough directly on parchment so the cut panels can be moved without stretching or cracking.
- Keep the dough thickness even across all pieces so the walls and roof meet neatly during assembly.
- Trim the baked panels while they are still warm for the cleanest, straightest edges.
- Use a glass or small can on each side of the walls during assembly if you need support while the icing begins to set.
- If the royal icing feels too stiff to pipe, mix in a few drops of water; if it feels too loose, beat in a little more powdered sugar.
Nutrition Information
| Per Serving | Approximate Amount |
|---|---|
| Calories | 389 kcal |
| Carbohydrates | 63 g |
| Protein | 6 g |
| Fat | 13 g |
| Saturated Fat | 5 g |
| Cholesterol | 31 mg |
| Sodium | 146 mg |
| Fiber | 3 g |
| Sugar | 39 g |
These values are approximate estimates per serving based on dividing one assembled chalet into 10 servings. Actual nutrition will vary with panel thickness, icing use, and the exact amount of almonds applied to the roof.
Storage & Make-Ahead Tips
Store the assembled chalet loosely covered at cool room temperature for up to 2 days if your kitchen is not warm or humid.
For longer storage, keep individual pieces in an airtight container at room temperature for up to 5 days after the chalet has been broken apart.
If making ahead, bake the cookie panels 1 day in advance, cool completely, and store them flat in an airtight container before assembling.
FAQ
1. Can I make the dough ahead of time?
Yes. The dough can be prepared up to 2 days ahead and refrigerated well wrapped. Let it sit at room temperature for a few minutes if it feels too firm to roll.
2. What if I do not have chalet templates?
You can draw simple templates on parchment or printer paper using the dimensions in the recipe. Keeping matching pairs the same size is more important than making the shape elaborate.
3. Can I use store-bought icing?
You can, but a thick homemade royal icing is usually stronger for assembly. If using store-bought icing, choose one firm enough to hold peaks and support the roof panels.
4. How do I keep the walls from sliding during assembly?
Pipe a generous line of thick icing at the seams and hold the pieces together briefly until they begin to set. Small jars, cans, or glasses placed around the walls can help support the structure.
5. Can I toast the almonds first?
It is best to use the sliced almonds untoasted because they will toast lightly in the oven as the roof panels bake. Pre-toasted almonds may darken too much during baking.
Final Thoughts
This chocolate gingerbread chalet is a beautiful baking project that brings together classic holiday spices, rich cocoa, and simple decorative details in a dessert that feels special from every angle.
Whether you present it as a table centerpiece or break it apart for dessert, the crisp almond roof and dark gingerbread panels make every serving festive, flavorful, and memorable.
Chocolate Gingerbread Chalet with Almond Shingles
Ingredients
- 2 1/2 cups all-purpose flour
- 1/2 cup unsweetened cocoa powder
- 1 teaspoon baking soda
- 1/2 teaspoon fine salt
- 2 teaspoons ground ginger
- 1 1/2 teaspoons ground cinnamon
- 1/4 teaspoon ground cloves
- 1/2 cup unsalted butter softened
- 1/2 cup packed dark brown sugar
- 1/2 cup unsulfured molasses
- 1 large egg
- 1 teaspoon vanilla extract
- 2 tablespoons milk
- 2 large egg whites
- 3 1/2 cups powdered sugar
- 1/2 teaspoon cream of tartar
- 1/2 teaspoon vanilla extract for icing
- 3/4 cup sliced almonds
Instructions
- In a medium bowl, whisk together the flour, cocoa powder, baking soda, salt, ginger, cinnamon, and cloves until evenly combined.
- In a large bowl, beat the softened butter and brown sugar until smooth and slightly fluffy, about 2 minutes. Beat in the molasses, egg, and vanilla extract until fully combined, then mix in the milk.
- Add the dry ingredients to the wet ingredients and mix on low speed or stir with a sturdy spoon until a firm dough forms with no dry streaks remaining.
- Divide the dough into 2 flat discs, wrap well, and chill for 45 minutes so it is easier to roll and cut cleanly.
- While the dough chills, prepare paper templates for 2 roof panels about 6 by 4 inches, 2 side walls about 5 by 3 inches, 1 front wall about 4 by 5 inches with a peaked top, and 1 back wall to match.
- Preheat the oven to 350°F and line 2 baking sheets with parchment paper.
- Roll one disc of dough between sheets of parchment to about 1/4-inch thickness. Cut the chalet pieces using the templates, rerolling scraps as needed. Transfer the cut pieces to the prepared baking sheets, spacing them slightly apart.
- For the roof panels, gently press sliced almonds in overlapping rows onto the dough to resemble shingles, leaving a small border around the edges so the icing can adhere later.
- Bake the smaller wall pieces for 8 to 10 minutes and the larger roof pieces for 10 to 12 minutes, rotating the pans halfway through, until the centers look set and the edges are firm.
- If needed, trim the pieces immediately after baking while still warm, using the templates and a sharp knife for clean edges. Let the panels cool on the baking sheets for 10 minutes, then transfer to a wire rack to cool completely for 30 minutes.
- To make the royal icing, beat the egg whites, powdered sugar, cream of tartar, and icing vanilla extract until thick, glossy, and able to hold stiff peaks, about 5 to 7 minutes. Keep the bowl covered when not in use so the icing does not dry out.
- Spoon some icing into a piping bag or zip-top bag with a small corner snipped off. Pipe a thick line of icing along the edges of one side wall and the front wall, then hold them together upright until they begin to set. Repeat with the second side wall and the back wall to form the chalet base.
- Let the assembled walls stand for 15 minutes to firm up, then pipe icing along the top edges and attach the two roof panels. Hold each panel briefly so it stays in place, then add extra icing along the roof seam and all outer joints for strength.
- Decorate the chalet with piped window frames, snowy roof edges, and a border around the base. Let the finished chalet rest for 20 minutes before moving or serving so the icing can fully set.